How to Install Under Cabinet Ductless Range Hood
Range hoods are must-have equipment that allows you to appreciate your cooking session while breathing smoke-free air. Looking for a new range hood? Or replacing a range hood in a contemporary kitchen? I would recommend ductless range hoods because they are simple to mount.
A ductless range hood cleans dirty air by pulling it into a charcoal filter. Check with the local construction department about the correct mounting distance between the fan unit and the stovetop prior to fitting a range hood. For a standard system, the distance will range between 24 and 30 inches. Often switch off the electricity to the proper circuit by turning off the breaker at the apartment’s service panel before starting any electric task.

Why Should you Install Under Cabinet Ductless Range Hood
When you are purchasing a ductless range hood, you must consider ductless under cabinet range hood mounting. Since ductless range hoods do not need specialized vents or massive extractors to escape the air outside, there seems to be no extra carpentry activity involved.
As opposed to ducted hood installation, recirculating range hood installation is indeed very straightforward. If you all live in apartments where you can’t exhaust externally or where the duct pipes can’t be placed outside your kitchen, an under cabinet ductless range hood is the best option.

Items Required to Install Under Cabinet Ductless Range Hood
First and foremost, here are the tools needed for mounting an under cabinet ductless range hood in your kitchen. The majority of these items are almost certainly already in your possession. To make the job simpler, collect all of your resources before you begin.
- Tape measure
- A pencil
- A workbox
- Level
- Wire Stripper
- Drill and Drill bits
- Tracing paper
- Circuit testes
- Screwdriver or drill

Steps to Install Under Cabinet Ductless Range Hood
For hood height specifications, follow the company’s guidelines as well as local standards. It is also possible that the range hood would need to be converted to work without a duct. Depending on the model, certain range hoods can work with or without a duct device.
For specific guidance on changing the range hood, consult the recommended guidelines. To enable a range hood to work without a duct, you must first rotate the fan motor and seal the gap with a metal plate. The following are step-by-step guidelines for installing a ductless range hood under the cabinet.
Step 1: Template
Making a template with a pencil is the initial step in installing a ductless hood.
- To efficiently mount your range hood, ensure you locate the cabinet’s base.
- When you have two cabinets above your range, it is essential to locate the middle such that your range hood looks symmetrical after installation.
- To find the middle of your wall room, use a level.
- You could get a template for the range hood to mark the screw holes.
- If not, get assistance to develop a template. If you do not have one, get someone to help you keep the range hood as you outline the holes, and set it aside.
Step 2: Measurements
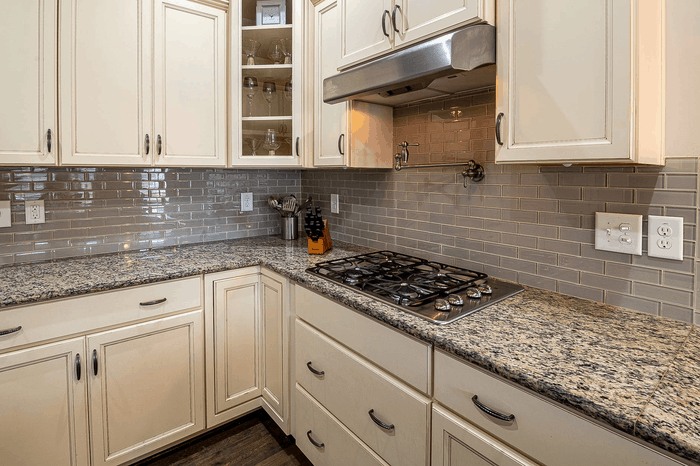
Range hoods are mounted at the bottom of a kitchen cabinet above the stove. Cabinets in modern houses may have measurements that are appropriate for range hood construction, whereas older households may not.
To decide whether there is adequate clearance, calculate the thickness of the range hood and apply the required height specifications. If there isn’t plenty, you will have to make changes to the relevant cabinet. This will necessitate removing the cabinet or raising it to satisfy height specifications.
- Determine the ductless hood’s height and mount it between 28 inches and 36 inches over your stovetop.
- Make measurements and length of your range hood after settling on your design on how to install and where to mount your ductless hood.
- Make the markings on the wall as per the dimensions.
- Make a note of the dimensions of your ductless hood’s screw holes or mounting points.
- On a cardboard block, mark the middle and the two mounting points.
Step 3: Drilling
Often, you will need to drill the top of your ductless range hood where the screw would go.
- Place the cardboard, together with the wall, under your cabinets until you’ve made your imprints on it.
- Drill it through cardboard markings in the wall where the mounting points will be mounted with a 1/8-inch bit.
Step 4: Circuit
For this step, if you are not familiar with electrical jobs, I would recommend you to get it done by an electrician.
- Position an old workbox against the wall near the location where the wires would appear.
- Use a circuit tester to inspect the holes along the middle line.
- Switch off the circuit that controls the breaker until all of the circuits and wires are live.
- Using a wire stripper, remove a small amount of wire from the edges of each insulated wire.
- Create a J shape with the uncovered ends of the wire.
- Then loop it with the black wire on the electric receptacle.
Step 5: Fixing the Range Hood
While implementing this step, or all the other steps exercise caution because safety always comes first!
- Keep your ductless range hood in one hand and slide it over the mounting screws in the other.
- Cautiously tighten the screws.
- Locate the two studs beneath your range hood and secure them in the designated locations.
- Since it won’t be obvious, you will need to use a stud finder to locate it.
Step 6: Power Source
Did you know that a range hood is a hard-wired gadget that runs off of a 110 Volt power supply?
- When you have completed all of the wirings, test the range hood by plugging it into an electrical socket.
- Even though a separate circuit for the small unit is not needed, you would not want to overpower current circuits either.
- Assess the overall load on the system.
- Ensure that applying the load of the range hood won’t surpass the circuit’s protected capacity which is usually 80% of the total capacity.
- If you can’t find an appropriate power source, employ a professional electrician to add a circuit.
Step 7: Filter Installation
You won’t have to open the chimney until you’ve finished installing and checking your range hood. So, the final move will be to install your variety of hood filters (aluminum, mesh, baffle, and so on).
- The unit is kept in place as the wire is threaded into the connector and the mounting screws are mounted.
- Once the range hood is secured to the cabinet floor, use wire nuts to attach the range hood’s leads to the supply wire’s hot, neutral, and ground wires.
- Replace any covers and install the filters to complete the job.
In conclusion, range hoods are an effective way of reducing smoke, steam, as well as other substances generated while cooking. Even though ductless range hoods are simple to mount, you may want to enlist the assistance of a professional. And, secure your range by shielding it with a cardboard sheet or a piece of plywood as you mount your ductless range hood underneath your cabinet. I hope you enjoyed reading this article about How to Install Under Cabinet Ductless Range Hood.
To get the perfect functionality and look in your kitchen, consider the directions that come with your under cabinet ductless range hood. Enjoy your latest range hood, which is safely hidden under your kitchen cabinets! Let me know all your thoughts and queries in the comments section below!
