
How to Install a Kitchen Exhaust Fan (Step-by-Step)
Did you know that high humidity causes moisture issues in kitchens? Heat and moisture interact to create dampness. It occupies the space and condenses as it comes into contact with colder walls and ceilings, going back to water. Fungus, mildew, and even structural rot thrive in this setting.
Any kitchen needs airflow to remove humid air before it condenses. They often require ventilation to remove steam and bad smells. In most situations, an exhaust fan or range hood provides the perfect ventilation. In today’s article, we will delve deeper into the steps for mounting a Kitchen Exhaust Fan.
Why do you Need a Kitchen Exhaust Fan
An exhaust fan is a must-have kitchen device for keeping the room clean and comfy, as it extracts grease, odors, as well as a lot of smoke produced by cooking tasks such as boiling, baking, or grilling.
Multiple exhaust fans are available in several different mounting choices. The exhaust fan you select is determined by considerations such as use, counter space, surface area, kitchen height, and so forth. The kind of exhaust fan you select will determine how easy it is to install one in your kitchen.
Exhaust Fan Installation Types
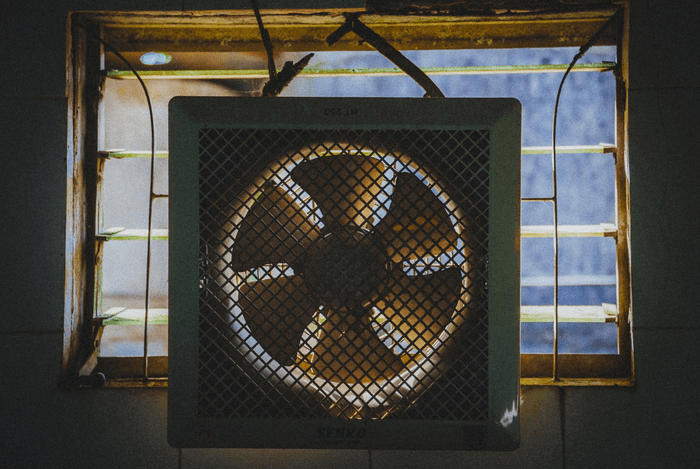
Some of you want a ceiling exhaust fan, and others want a window exhaust fan. There are, of course, other choices. Range hoods, downdraft units, microwave hoods built-in, and so on. But, first, let’s look at the different styles of kitchen exhaust fan setups.
- Exhaust fans that are positioned on the wall are often used. If you don’t have a cabinet above your stove and your kitchen has a lot of empty room, this is a perfect choice.
- Fans installed on the underside of your kitchen cabinet, right above your stove, are known as under cabinet exhaust fans.
- Downdraft systems are a kind of ventilation that resides behind or beside the stove and ventilates the kitchen by pulling air down to a duct under the surface.
- Microwaves with built-in vents for over-the-range installation have a built-in ventilation system that redistributes air from the cooktop.
- Ceiling-mounted exhaust fans are fixed to the ceiling above your stove.

Vented versus Unvented Exhaust Fans Installation
There are two kinds of kitchen exhaust fan installations: vented and unvented. Before we get into the installation phase, let us look at the differences between the two.
Vented Exhaust Fans
These vents are connected to a duct that moves air from the kitchen to the outside. These exhaust fans are often preferred because they extract steam, grease, odor, fire, and smoke from your kitchen while also improving indoor air quality.
Grease and other toxic or annoying substances that may otherwise collect on your countertop or appliances may be removed with the aid of vented fans. If you don’t have ducts in your home, mounting an exhaust fan would be complicated and costly.
The duct must extend behind or around the kitchen cabinet to an outside wall for under cabinet or wall installation, and if you would like a ceiling-mounted exhaust fan, the vent must pass above the ceiling to the exterior.
Unvented Exhaust Fans
As the name suggests, since they don’t have a duct, unvented exhaust fans are ductless. They recirculate air into the kitchen while filtering grease and bad smells. However, this kind of exhaust fan would not assist you in removing moisture or heat from your kitchen.
A ductless exhaust fan can be used in almost any place in your kitchen, so the placement of your stove or cabinet is irrelevant. Unvented exhaust fans are a convenient and less costly option if you are only staying for a short time and they consume less power as well.
Step by Step Guide to Install a Ducted Exhaust Fan
The procedures for installing a ducted exhaust fan are outlined below.
Step 1: Determine the location of your exhaust hole
- Determine the path for your vent from inside the kitchen to the attic or outside the kitchen.
- Cut a hole between the joists to accommodate your vent tubing.
- To make a hole in the attic or crawlspace, move the tip of the drywall saw into the ceiling.
Step 2: Add your Duct
- Place your duct against the area where you inserted your saw.
- Draw a circle around the edge of your duct.
- Outline the cabinets where you will cut the duct holes.
- Cut a circle out of drywall to fit the vent pipe into the opening.
Step 3: Install the Duct Elbow
- Once you have cut the hole and installed all of the ductwork
- Reposition the plumb bob in the attic so that it is in the center of the conduit that comes up from the kitchen.
- Attach a four-inch elbow to the exhaust port you installed in the kitchen.
- Seal the seam with aluminum face duct tape.
Step 4: Mount the Exhaust Fan
- Connect the exhaust fan to the transfer duct shaft.
- Make sure the damper flap is free-moving when doing so.
- Lift the exhaust fan or hood into the desired location and secure it to the wall.
Step 5: Link Connector Duct to Wall Cap
- The final step is to link the connector duct to the wall cap
- Then fit the cap into the opening in the outside wall.
- You may use a rubber gasket and silicone to protect the corners.
Step by Step Guide to Install a Ductless Exhaust Fan
The procedures for installing a ductless exhaust fan are outlined below.
Step 1: Measure the available space
Ductless exhaust fans are adaptable and can be mounted anywhere in the kitchen. As a result, determine the best location for the fan to be mounted.
Step 2: Confirm Measurements
Check the measurements on your exhaust fan to make sure you have enough room to mount it, such as the height, size, and space needed.
Step 3: Mount the exhaust fan
Directions for mounting the exhaust fan can be found on the hood. Implement the installation directions for your ventilation system point by point.
Step 4: Anchor Exhaust Fan to Studs
Finally, you will need a stud finder to secure the exhaust fan to the studs.
Replacing an Existing Fan with a New One
As long as the new fan fits in the same gap and can be attached to the original exhaust vent, swapping an existing fan with a new one is a pretty simple DIY project. Setting up a new fan where there was previously no fan is more difficult, although it is also easier if you position it above a current ceiling light fixture. Here are all tasks that must be completed before installing the fan housing.
- Breaking a hole in the ceiling at the light fixture’s position
- Crawling a vent pipe (or duct) from there to an exterior wall
- Breaching the exterior wall for the vent
- Inserting a vent cap
Next, consider buying a fan with a built-in light to substitute the light you removed for this project. Contact a specialist if you feel like the vent work is above your experience level.
Points to Keep in Mind while Installing a Kitchen Exhaust Fan
I would recommend you to make absolutely sure you don’t skip any steps, as this will result in your ventilation system becoming less efficient. I will also make life easier for you by providing a list of tips you can follow while installing a Kitchen Exhaust Fan.
- Before you begin the assembly, gather all of the appropriate equipment, such as an extension cord, jigsaw, measuring tape, tin snips, knife, caulk pistol, drill tool, and dust cover, among others.
- Ensure the kitchen exhaust fan is installed at the proper height. Install it between 24 and 30 inches above your cooktop, or even a little higher if you’re tall, just no higher than 36 inches.
- Make sure your overall duct length does not surpass your exhaust fan’s airflow capability.
- Ductless fans are flexible and simple to mount, but ducted fans need more effort, so seek professional assistance.
- For efficient operation, guide your exhaust fan to the simplest and ideally straightest path to the outside. You will get good ventilation with the minimal grease accumulation possible.
- If you are going to replace the exhaust fan with a newer one, ensure the new model will align in the same opening and attach to the current exhaust duct.
In conclusion, trying to install a kitchen exhaust fan is not difficult, but it must be done with caution since the dimensions, duct height, and connections must all be known. Installing a new exhaust fan is often simpler because you can select any kind of exhaust fan and mounting choices, but it takes a bit longer than replacing an old exhaust fan. I hope you enjoyed reading this article! Let me know all your thoughts and queries in the comments section below!